Unless you’ve been hiding under a rock somewhere the past few years chances are you will have heard of Git and Github. And how they are taking over the (developer) world. And if you’ve been in tune with recent developments around DNN, you will have heard that DNN, too, has a repository on Github and is currently managed using Git. So what’s the big deal?
Git vs subversion in a couple of sentences
In the old way of doing things you had one central repository of your files and each developer in the team had his/her local copy which was read-only. Then, when someone wanted to make a change to a file, he/she would unlock the file, locking it for all others and check in the edited file. When a file was edited the difference between the two files was stored so it was easy to track back and see which changes had been made by whom and when.
In Git the files are stored both on a server and locally on your hard disk (i.e. you have a copy of the complete repository and its history). Your source control is done locally on your hard disk. The copy you work on is read/write and at any point in time you can ask Git to compare what you have with what is in your repository. Then you can make “commits” to the repository labelling what you have done. At any point you can tell Git to upload the local changes to the central repository. It is at this time you may be required to resolve conflicting changes.
Why is Git so popular?
Well it allows people to get on with their work without the fuss of being online to check if anyone has checked out files/is working on things. It is perfect for distributed teams. Both geographically as well as temporal (i.e. dealing with the issue of developers leaving a project when they still have files checked out).
Secondly, the business of keeping your own work isolated from other people’s changes has become easier through “branching”. The way Git works, branching is trivially easy and does not lead to bloat of your repository (no files are being copied, etc). Not convinced? Take a look at the video of Scott Chacon on Youtube explain Git in detail (maybe he needs to lay off the Red Bull before a presentation). That video sparked my interest.
Why is Git so hard?
Where checking out repos and branching is easy, the business of merging and catching up with what other people have done is not trivial at all. This is the point at which most people begin pulling their hair. For all of its conceptual simplicity, it can be very hard to deal with managing local and remote branches and not getting your repository in a complete mess.
Secondly there are a gazillion Git tools out there. It is very easy to lose track of what to install and in which order. For us Windows folks, that is always the shock when we peer over the wall to the Linux folks. Installation always appears to be dark art. For this blog post I am using Atlassian SourceTree, a free (not Open Source, sigh) graphic shell for Git. Because its roots are in Linux, Git itself is not graphic at all. It’s a set of commands that are entered in a Bash shell (yes, Bash, from Bourne Again) (EDIT: it is off course a regular command shell, but on my machine the makers called it Bash to not scare would-be Linux converts I guess)
Skipping a couple of steps
For this blog post I’m assuming you’ve installed Git and some graphic shell. I’m also assuming you know the basics. I.e. you’ve been able to sit through the first half of the video mentioned above and you know the vocabulary (repo, staging, commits, branch, checkout, etc) and how to create a repository and commit files. If you don’t, please try that first with a trivial example while taking guidance from Git’s excellent online documentation. I will also assume you have created an account on Github.
What I wish to focus on in this article, is how to do DNN enhancement requests through Git. I.e. to propose code changes. This is a little more involved than the “hello world” examples you’ll see because DNN is a bunch of projects of which one is a website.
Getting into the game by downloading DNN
Normally we’d download the source version of DNN from Codeplex if we wish to dig into source code of DNN. Now we’re going to take a different route. We want to have the repository of DNN on our machines so we can begin tweaking code that DNN is currently working on and be able to insert our stuff into the workflow. The first thing to realize is that you’ll build up a chain of copies of the source code as follows:
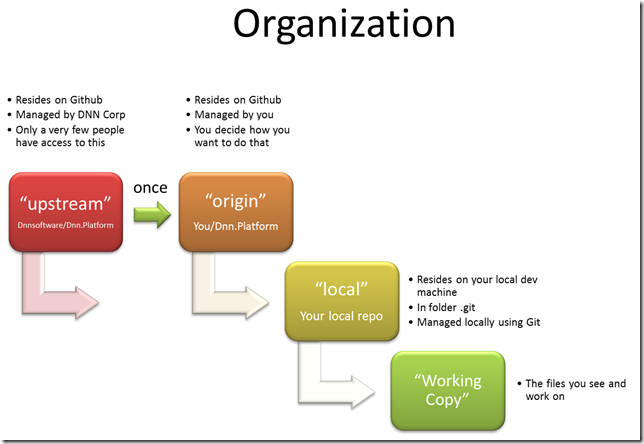
So this means that at the end of this part of our journey, there are four (!) copies of any one file that you see in the folder for DNN (not counting other people’s copies of course). This may seem a waste but it has its reasons. So here we go:
Step 1: Git Fork
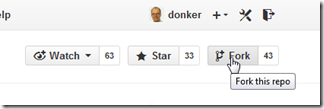
Yes, the F-word is right at step 1. Forking permits someone to change a codebase. DNN is hosted on Github so you can fork it, too. It takes a couple of seconds only. First, make sure you’re logged in on Github. Then go to the DNN central repository: https://github.com/dnnsoftware/Dnn.Platform This is where employees of DNN Corp upload there latest changes to. We will now create a copy for ourselves by forking this repository. Click on the “Fork” button at the right top:
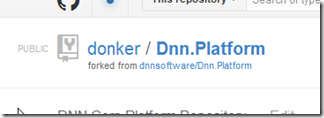
You will now see the Dnn.Platform appear under your own name:
Step 2: Git Clone
You will now create a copy of this repository on your dev machine. Note that this repo contains the complete history of DNN, so you may want to grab a cup of coffee *and* walk the dog afterwards. I think it’s about 1Gb of data when I did this. There is a link on the Github page of your fork for this operation:
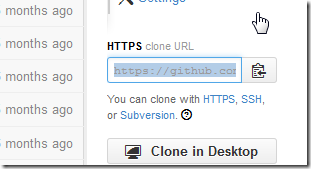
Use your favorite tool to clone or in the git bash (started at a convenient location on your hard disk) simply type
git clone {your clone url}
After this operation you will see the DNN project appear on your hard disk. These files are the latest “state” of the repository. Underneath a hidden directory called “.git”, however, all previous files are stored and a bunch of other info about the project. That is the “local” repository. The files you actually see are called the “Working Copy”. These you can begin to manipulate.
But wait. Not so fast. We need to ensure that later we can communicate our changes back to DNN Corp. This requires a few more steps before we start coding. We also need to get the website up and running. Right now it’s just a bunch of files on your hard disk. If you think you can point IIS to it and fire up, you’re in for a bad surprise.
Step 3: Connect the original DNN repository
This is not an essential step at this point and you can skip this. But you should realize that the repository on Github that you created in the first step is now frozed at the point in time it was created. It will not receive updates from DNN Corp’s repository. Ever. This may seem counterintuitive but it is how this process works. You fork DNN Corp’s repo, which creates a copy under your own name, once. Then you create you local repo on your dev machine and any changes to the Corp’s repo pass through this local repo to your forked repo on Github. To keep things apart there is a naming convention. The repo your create on Github will be referred to as “origin”. The repo on your dev machine that you created in step 2 is called “local”. And the original repo of DNN Corp is called “upstream”. The Github hosted repos are called remotes. So what you need to do is to add upstream remote.
git remote add upstream https://github.com/dnnsoftware/Dnn.Platform.git
Step 4: Git Branch and Checkout
We now need to isolate what we are going to do. I.e. making sure we are not programming straight into the main trunk (old svn term), but we branch off from a particular commit and begin playing there. That way we can always roll back our changes or park our changes and start doing other stuff. The first thing to do, here, is to choose a point to branch from. If you’re using a graphic shell you’ll see there are a myriad of commits to choose from.
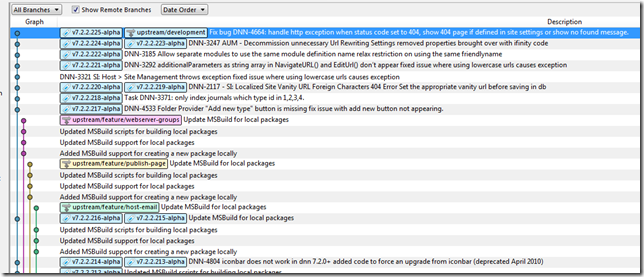
So which should you choose? You can start from the last release if you wish to just look at how the last release was made. EDIT: But it depends on what you want to achieve. If, like in this example, you want to submit something, then it's easier for the DNN engineers if you start from the latest commit in the development branch (Thanks, Joe, for pointing that out). So look for a branch called "development" if you can. For the remainder of this demo I'll branch off from the latest release. As I write this, DNN Corp is working hard on the 7.2.2 release of the DNN Platform. So I need to scroll down a bit to find a commit labelled “origin/721_Release” and “upstream/721_Release” (i.e. this commit exists in both of those repos and is called “721_Release”). Now we will begin our work. We will branch off from there as follows:
git checkout -b 721_Release origin/721_Release
What this does is to create a branch called 721_release locally based on the 721_Release of DNN Corp and to switch to that branch. At this point you may notice some files getting changed in your working directory. Git is putting everything in order for you to work on this.
Step 5: Setup your website
It wouldn’t be much use if we can’t call up the website. Like I said before, it’s a bit more involved than just hitting it with the browser or pressing F5 right now. But it isn’t all that difficult either. So at this point I’ll let you set up a database on your SQL server and to set up a url for the site and add the website to IIS and modify the hosts file. This is fairly straightforward stuff if you’ve ever created a site on your dev machine. But don’t test the url yet! Wait for it …
Step 6: Build
DNN needs to be built before we can call up the site. To do this, I will copy the solution file of my choice (DNN_PlatformNoTests.sln) to .local.sln. Files with .local in their name are ignored by DNN’s Git, so they won’t show up as part of your change.
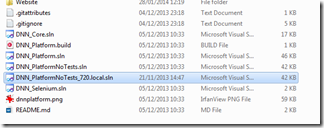
Edit the file (I find this the easiest with a simple text editor) to change the url for the website in the solution to the url which you created for yourself in the previous step. Now, when you double click this solution file, VS should fire up and load correctly. Now all we need to do is to build in release mode. Why release mode? Well, in this mode, the project targets include the complete packaging of the modules that are in the solution and add them to the install directory of your DNN site. So:
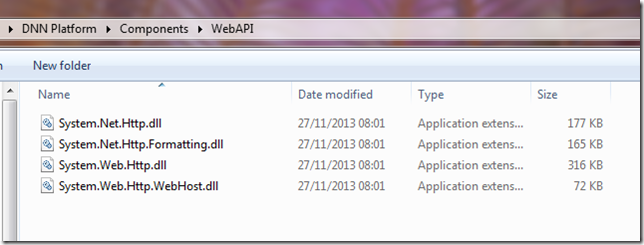
This should go well. If it doesn’t then you may be missing the WebAPI dlls referenced in the project that are missing from DNN Platform\Components\WebAPI. You can find them in the distribution zip of any recent version of DNN.
Step 7: Rename/copy release.config to web.config
It’s easy to forget this one. So I added this as a separate step. Make sure that the web.config is there!
EDIT: apparently this is done automatically (now). I'm not sure if I missed that earlier or if this was changed. (Thanks Cathal).
Step 8: Call up the website
Once the build is successful the system is primed to run. So we can call up our site. It should show the familiar installer and walk you through the steps. Make sure to enter the DB data (if you’re like me you always have the DB separate in SQL server) if needed.
Doing your thing
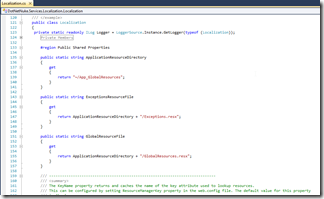
You should now have a functioning site and a starting point for your work! We will now continue by making a change to DNN. What we’ll do is to make a rather trivial change, which is to add some documentation to a few static properties in the Localization class. The old API of DNN is not fully documented and anyone can help to improve this.
Step 9: Create (another) branch for your work
Yes, you’re going to create another branch. We’ll give it a name we can recognize. I’ve called it “locdocumentation” in this example.
git checkout -b locdocumentation
What this does is to create a new branch and switch to it. Nothing will change on your working copy of DNN. But any changes we now make will be tracked under the banner locdocumentation.
Step 10: Make your changes
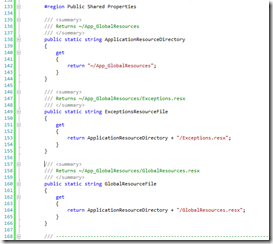
This is the part where I probably don’t need to explain much. Just do what you want to the source code and test to see if it works. This is what I did:
| Before |
After |
 |
 |
Step 11: Commit changes
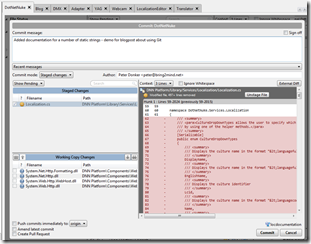
Now commit what we’ve done to our (local) repo. For committing I love using a graphic shell for Git as you can select files by hand and not have to bother typing the names of those files in a bash shell. So I’ll show you the screenshots from Atlassian SourceTree. I presume you’re familiar with the concept of committing changes, so I won’t spend more time on that, here.
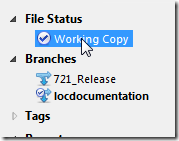
| Select Working Copy |
Add the file that we changed |
 |
 |
| Create the commit |
Resulting commit in the branch tree |
 |
 |
Note: if you are working on a code change, DNN Corp prefers you do this based off a Jira ticket. Jira is DNN’s bug tracking software and it can be found here: http://dnntracker.atlassian.net/ If you plan a change you should add a ticket in here and reference that in the commit. The convention is to start the commit message with the Jira code for the ticket, i.e. “DNN-1234 Added documentation on static texts”. This helps everyone else keep track of where commits are coming from and what they intend to do.
Step 12: Push my changes
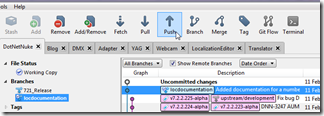
Now we’ve created a small change to DNN and stored this locally. The next step is to push this to our repo on Github. Again I’ll use SourceTree for this:
| Click Push |
Select branch to push and remote to push to |
 |
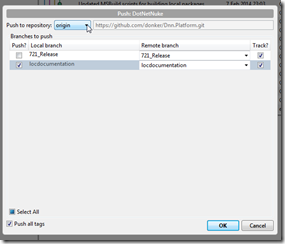 |
We’re done with our local work, for now.
Step 13: Make a pull request
The business of proposing code changes on someone else’s repo is called “pull requests”. This comes from “I request that you pull this change from my forked repo of yours into your own repo”. What you’re going to be doing is to create a pull request that will be sent to DNN Corp’s team of engineers to review. Note they may refuse your request! I’m just mentioning this in case you’d think otherwise.
First you’ll want to head over to Github to your own forked repo (i.e. origin). If you click on the branches dropdown you should now see the locdocumentation branch we uploaded earlier:
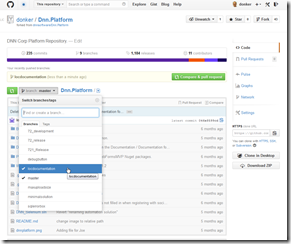
Select the locadocumentation branch. You’ll find that there is a “Compare & pull request” button at the top. Click that.
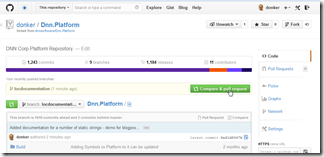
Github is now going to do something smart. It is going to take a look at the original repo and it is checking if this can be merged into it. I.e. if they haven’t changed this file in the meantime. You should see this:
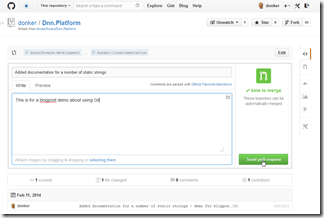
At the top you’ll see to which branch this branch of ours is being compared. Make sure you select “dnnsoftware/development”. This means it can be merged by any engineer right into their development workflow. If you leave this on “dnnsoftware/master” you’re effectively asking them to create a new release for this change. That’s unlikely to happen. So set it to development and you won’t upset anyone.
Now fill in the title and message with something meaningful so the engineer on the other side doesn’t need to do a ton of research. Then click “Send pull request”. That’s it. You’ve now made your first contribution to the DNN Platform. You. The armchair coder. Not employed by DNN Corp, but still with the power to make a difference.
Resetting
After you’ve made your awesome pull request you may want to sit back and relax a little. You have other things to do in life, so you move on. At the same time, DNN Corp is frantically working on the platform code. So how do we go about getting back into the game at a later date? Your local repo is out of date. And so is your cloned repo. Plus they’re both dirty with files and things you’ve added during your earlier adventures. But it’d be a big waste of bandwidth and time to just throw away your two repos and begin from scratch. How do we properly start again with a clean system?
Step 14: Clean up by committing any changed files
Git has a nasty habit of not letting you do anything until all local changed files are either committed or rolled back (or stashed). Of course it’s trying to help you not lose any work, but sometimes we just wish to throw away our stuff and begin anew. Anyway, the simplest is either to commit all pending changes into the branch you were working on, or to discard any changes still there. Assuming we’re still on our locdocumentation branch I can do this as easy in the graphic shell as in the bash shell:
git add .
git commit -m "cleanup before project reset"
We should now have a clean working directory
Step 15: Fetch from upstream
We will now pull in any changes made to dnnsoftware’s repo. Simply:
git fetch upstream
You’ll see the new commits and tags being downloaded to your local repo. At this point our local files have not changed, only the local repo in the .git directory. We’ll need to redo our site, etc.
Step 16: Checkout the commit you wish to branch from and branch from it
This is similar to what has been described in step 4 above, so I won’t repeat this, here.
Step 17: Clear out DB and website directory
If you’re like me, you have a script ready for the DB reset. It really makes things so much easier. Drop the DB and create it again. Then just throw away all files from the website directory. That way you are sure no files are left hanging around that you may have introduced in an earlier edit.
Step 18: Git reset
This command forces git to write the files of the commit you’re working from to be copied to disk:
git reset --hard yournewbranch
You’ll see the website directory filling up with files again.
Step 19: Rebuild etc.
Now you should be on familiar terrain. You have a clan working directory with the copy of DNN that you want to work from. So rebuild in release mode, rename the .config file and fire up that website.
Step 20: Updating our Github repo
At some point in time we will need to update our forked repo on Github. It doesn’t have any of the changes that dnnsoftware’s repo has made since it was forked. The only way to get them there is to push them from our local repo. The easiest way to do this is to click the “Push” button in your graphic shell, select the branches to push, and let it take care of the rest.
Final remarks
A pull request is essentially a prepackaged change set. At DNN Corp they’ll quickly see what changes are being made and just by clicking OK, your code is introduced into the core. Use this power with discretion. There are busy people on the other side who need to stick to a murderous release schedule. You’ve effectively barged into the room with a proposed change. Someone will always need to make sure the change doesn’t conflict with the roadmap, the release schedule, the DNN coding standards, etc, etc. So there is some risk of disappointment. But that being said: the door is now open to community contributions to the platform and that is something to embrace.
EDIT: Here is a link to their contributions policy: https://github.com/dnnsoftware/Dnn.Platform/blob/master/CONTRIBUTING.md